Ancient grains like sorghum, teff, and spelt are nutritional powerhouses rich in fiber, protein, and antioxidants. They are a creamy, earthy, and delicious addition to meals, offering a healthy and diverse alternative to modern grains.
Introduction
There are numerous ancient grains that have gained popularity in recent years, thanks to their impressive nutrient profile and unique taste. Here is a list of 10 best ancient grains:
- Quinoa: This grain originated in the Andean region of South America and has been cultivated for over 5,000 years. It is high in protein, fiber, and essential minerals like iron and magnesium.
- Amaranth: Native to Central and South America, amaranth is a gluten-free grain that is rich in protein, calcium, and phosphorus.
- Kamut: Also known as Khorasan wheat, Kamut has been grown in Egypt for over 4,000 years. It is high in protein, fiber, and essential minerals.
- Teff: Originating from Ethiopia, teff is a tiny grain with a nutty flavor and high amounts of protein, iron, and calcium.
- Farro: Often referred to as “ancient wheat” and emmer, farro has been cultivated in Europe for over 10,000 years. It is high in protein, fiber, and B vitamins.
- Spelt: Another type of ancient wheat, spelt has been grown in Europe for over 8,000 years. It is high in protein, fiber, and essential minerals like iron and manganese.
- Freekeh: This grain has been used in Middle Eastern cuisine for thousands of years. It is high in protein, fiber, and antioxidants.
- Einkorn: This ancient wheat has been cultivated for over 10,000 years and is high in protein, fiber, and essential minerals like zinc and iron.
- Millet: Commonly consumed in Asia and Africa, millet is a gluten-free grain that is high in protein, antioxidants, and essential minerals.
- Sorghum: This grain originated in Africa and has been used for food and livestock feed for thousands of years. It is gluten-free, high in protein, and rich in antioxidants.
Grains have been a staple food source for humans since the beginning of civilization. Ancient cultures around the world have cultivated various grains for thousands of years, making them an important
In recent years, ancient grains have gained popularity as a healthier alternative to modern wheat and other grains. They offer a variety of health benefits due to their nutrient-dense profiles and unique flavors. Additionally, they are often grown using
Quinoa: A Nutritional Powerhouse and Its Benefits
Quinoa, a grain originating from the Andean region of South America, has been hailed as a superfood due to its impressive nutritional profile. It is one of the few plant-based foods that contain all nine essential amino acids, making it a complete protein. Additionally, it is rich in fiber, magnesium, B vitamins, iron, potassium, calcium, phosphorus, vitamin E, and various beneficial antioxidants.
Quinoa’s high protein and fiber content can aid in weight loss by increasing feelings of fullness and reducing hunger pangs. The grain is also gluten-free, making it a perfect choice for people with gluten intolerance or celiac disease. Furthermore, its antioxidants have been linked to a reduced risk of several diseases including heart disease, cancer, and diabetes.
Does quinoa need to be dehulled?
Like most grains, quinoa has a hard outer layer called the husk. However, unlike other grains, quinoa does not require dehulling before consumption. The husk is edible and can be cooked along with the grain. This makes quinoa easier to prepare and adds an extra nutritional boost to dishes.
Simple Quinoa Salad Recipe
This simple and delicious quinoa salad not only showcases the grain’s versatility but also allows you to reap its health benefits.
Ingredients:
- 1 cup quinoa
- 2 cups water
- A pinch of salt
- 2 medium cucumbers, diced
- 1 large tomato, diced
- 1/4 cup chopped fresh basil
- 1/2 cup olive oil
- 2 tablespoons lemon juice
- Salt and pepper to taste
Instructions:
- Rinse the quinoa under cold water until the water runs clear.
- In a saucepan, bring water and a pinch of salt to boil. Add the quinoa, reduce the heat to low, cover, and let it simmer for 15 minutes, or until the quinoa is tender and the water has been absorbed.
- Once cooked, fluff the quinoa with a fork and let it cool.
- In a large bowl, combine the cooked quinoa, diced cucumbers, diced tomatoes, and chopped basil.
- In a separate small bowl, whisk together the olive oil, lemon juice, salt, and pepper. Pour this over the quinoa mixture and stir well to combine.
- Enjoy your healthy and delicious quinoa salad!
So, feel free to incorporate quinoa into your diet and reap its numerous health benefits.
Amaranth: Uses and Benefits
Like quinoa, amaranth is a pseudo cereal boasting a nutrient-rich profile packed with protein, fiber, and a multitude of minerals. It’s an excellent source of manganese, magnesium, phosphorous, and iron. The protein present in amaranth is particularly beneficial as it contains lysine, an essential amino acid that most grains lack. It is gluten-free, making it a suitable choice for those with gluten sensitivity. Additionally, it’s rich in antioxidants, which help combat oxidative stress in the body and can lower the risk of chronic diseases.
Does amaranth need to be dehulled? Not necessarily. Its nutrient profile remains unchanged whether it’s dehulled or not, but removing the hull can make it easier to digest and cook. Soaking amaranth overnight can also aid in digestion and reduce cooking time.
Simple Amaranth Porridge Recipe
Here’s a simple and nutritious recipe to help you incorporate amaranth into your diet.
Ingredients:
- 1 cup amaranth
- 2 cups water
- A pinch of salt
- 1 tablespoon honey (optional)
- Fresh fruits for topping (optional)
Instructions:
- Rinse the amaranth under cold water using a fine mesh strainer, as the grains are very small.
- Combine amaranth and water in a pot. Bring it to a boil, then reduce the heat to low and let it simmer, covered, until the grains are fluffy and water is absorbed, about 20 to 25 minutes.
- Remove it from the heat and let it stand, covered, for about 10 minutes.
- Stir in the honey if you prefer your porridge sweet, and top with fresh fruits if desired.
- Serve hot and enjoy a nutritious start to your day with this amaranth porridge.
Thus, amaranth is not only versatile in its use, but also packs a nutritional punch that can contribute to your overall health.
Kamut: Benefits and Simple Recipe
Much like amaranth, Kamut, also known as Khorasan wheat, is a nutritious ancient grain that’s as versatile as it is healthful. It’s noted for its high protein content, impressive fiber levels, and rich nutritional profile including magnesium, zinc, and vitamin E. It also offers a host of antioxidants and heart-healthy omega-3 fatty acids.
Does kamut need to be dehulled?
No, unlike other grains, kamut does not have to be dehulled before consumption. This makes it a convenient and easy-to-use ingredient in various dishes.
Here’s a simple recipe that shows how you can easily incorporate Kamut into your daily diet.
Kamut Salad Recipe
Ingredients:
- 1 cup of Kamut
- 3 cups of water
- A pinch of salt
- A variety of chopped vegetables (such as cucumbers, tomatoes, and bell peppers)
- Your choice of salad dressing
Instructions:
- Rinse the Kamut grains under cold water.
- In a large pot, add the Kamut grains and water, then bring to a boil.
- Reduce the heat to low, cover the pot, and simmer for about 60 minutes, or until the grains are tender.
- Once cooked, drain and allow it to cool.
- Mix the Kamut with your choice of chopped vegetables.
- Drizzle your preferred salad dressing over the top and toss to combine.
- Serve and enjoy your nutritious and hearty Kamut salad.
Incorporating Kamut into your diet can reap numerous health benefits, thanks to its rich nutritional profile. It’s a truly versatile grain that can add a nutty flavor and chewy texture to numerous dishes.
Teff: Benefits and Simple Recipe
Teff, a tiny grain native to Ethiopia and Eritrea, is yet another ancient grain that packs a punch in the nutrition department. Known for its high protein content, it also provides a good amount of dietary fiber and significant levels of iron, calcium, and essential amino acids. With its sweet, nutty flavor, Teff is a delightful addition to a variety of dishes.
Does Teff need to be dehulled?
No, Teff does not need to be dehulled before cooking, making it an easier option compared to other whole grains.
Let’s explore a basic recipe that will help you appreciate the unique qualities of Teff.
Teff Porridge Recipe
Ingredients:
- 1 cup of Teff grains
- 3 cups of water or milk
- A pinch of salt
- Honey or maple syrup for taste
- Fruits and nuts for topping
Instructions:
- Rinse the Teff grains under cold water.
- In a pot, combine the Teff grains and water or milk, then bring to a boil.
- Reduce the heat to low, cover the pot, and let it simmer for about 15 to 20 minutes, stirring occasionally until it becomes a thick porridge.
- Sweeten your Teff porridge with honey or maple syrup according to your taste.
- Top it with your favorite fruits and nuts.
- Serve warm and enjoy your nutritious Teff porridge.
Incorporating Teff into your diet not only adds variety but also enhances your meal’s nutritional value. Its versatility makes it a great ingredient for a wide range of dishes.
Farro: Benefits and Simple Recipe
Farro, a grain that dates back to Ancient Rome, is known for its rich protein content and hearty fiber. This robust and nutty flavored grain is also packed with essential vitamins and minerals such as B vitamins, iron, and magnesium. Including Farro in your diet can support heart health, aid in digestion, and provide a nice variety to your grain repertoire.
Does Farro require dehulling?
Yes, Farro does require dehulling before cooking. Dehulling removes the tough outer layer of the grain, making it easier to digest and cook.
Can it be dehulled at home?
Yes, Farro can be dehulled at home by using a fine-mesh strainer and rubbing the grains against each other under running water.
Here’s a simple recipe for “Farro Salad” to get you started:
Farro Salad Recipe
Ingredients:
- 1 cup of Farro
- 3 cups of water or vegetable broth
- A pinch of salt
- 1 cup of cherry tomatoes, halved
- 1 cucumber, diced
- 1/2 cup of feta cheese, crumbled
- Olive oil and lemon juice for dressing
Instructions:
- Rinse the Farro under cold water.
- In a pot, add Farro and water or vegetable broth, bring to a boil.
- Reduce heat to low, cover, and simmer for about 30 minutes, or until the Farro is tender.
- Drain any excess liquid and let the Farro cool.
- Combine cooled Farro, cherry tomatoes, cucumber, and crumbled feta in a large bowl.
- Drizzle with olive oil and lemon juice, toss to combine.
- Serve immediately, or refrigerate for later use.
Incorporating Farro into your diet adds a touch of ancient tradition and a burst of nutritional benefits. Its adaptability makes it a perfect addition to salads, soups, and stews.
Spelt: A Nutritious Grain and a Delicious Recipe
Spelt, an ancient grain related to wheat, is renowned for its high content of protein and dietary fiber. It is also a rich source of nutrients like magnesium, zinc, and iron. Including Spelt in your regular diet can contribute to boosting the immune system, improving digestion, and promoting healthy blood circulation. Its slightly sweet and nutty flavor makes it an excellent addition to various cuisines.
Does spelt need to be shelled?
Yes, spelt does need to be shelled before cooking. Unlike some other grains, spelt has a tough husk or hull that is not edible. This outer layer needs to be removed in a process called “dehulling” or “shelling” to reveal the edible kernel inside. Although it’s possible to do this at home, it’s labor-intensive and requires special equipment. Therefore, most people opt to buy spelt that has already been shelled or ‘pearled,’ which cooks faster and is ready to use in a variety of dishes.
Here’s a simple, wholesome recipe using Spelt: “Spelt Pilaf”.
Spelt Pilaf Recipe
Ingredients:
- 1 cup of Spelt
- 2 cups of water or vegetable broth
- 1 onion, finely diced
- 2 cloves of garlic, minced
- 1 red bell pepper, diced
- 1/2 cup of peas
- 2 tablespoons of olive oil
- Salt and pepper to taste
Instructions:
- Rinse the Spelt under cold water.
- In a large saucepan, heat olive oil over medium heat. Add onions and garlic and sauté until translucent.
- Add Spelt to the saucepan and stir for a couple of minutes.
- Add water or vegetable broth, bring to a boil.
- Reduce the heat to low, cover the saucepan, and let it simmer for about 40-60 minutes, or until the Spelt is tender.
- Stir in the diced bell pepper and peas, cover again and let it cook for another 5 minutes.
- Season with salt and pepper, then serve hot.
Incorporating Spelt into your meals not only brings a delectable change but also offers a fantastic nutritional uplift. Its versatility allows it to be a great substitute for rice or pasta, making your meal healthier and equally delicious.
Freekeh: Benefits and Simple Recipe
Similar to Spelt, Freekeh is another ancient grain packed with significant health benefits. Rich in dietary fiber and protein, Freekeh also contains a good amount of vitamins and minerals such as calcium, iron, and zinc. Its low glycemic index makes it a suitable choice for people managing their blood sugar levels. The smoky, nutty flavor of Freekeh adds a unique touch to various dishes.
Does freekeh need to be shelled?
Yes, freekeh is a whole grain that needs to be shelled before cooking. The process involves roasting the young green wheat over an open flame and then rubbing off the chaff, giving it its signature smoky flavor.
Freekeh Salad Recipe
Ingredients:
- 1 cup of Freekeh
- 2 cups of water or vegetable broth
Let’s look at a nourishing recipe using Freekeh, “Freekeh Salad”.
Freekeh Salad Recipe
Ingredients:
- 1 cup of Freekeh
- 2 cups of water or vegetable broth
- 1 cucumber, diced
- 1 cup of cherry tomatoes, halved
- 1/2 cup of feta cheese, crumbled
- 1/4 cup of fresh mint leaves, chopped
- 1/4 cup of olive oil
- Juice of one lemon
- Salt and pepper to taste
Instructions:
- Rinse the Freekeh under cold water.
- In a saucepan, bring the water or vegetable broth to a boil. Add the Freekeh, reduce the heat to low, cover the saucepan, and let it simmer for about 15-20 minutes, or until the Freekeh is tender.
- Drain any excess liquid and let the Freekeh cool.
- In a large bowl, combine the cooked Freekeh, diced cucumber, halved cherry tomatoes, crumbled feta cheese, and chopped mint leaves.
- Drizzle the olive oil and lemon juice over the salad. Toss well to combine.
- Season with salt and pepper, then serve chilled.
Adding Freekeh to your diet not only enhances the taste of your meals but also contributes to your overall well-being. Its versatility makes it a perfect substitute for rice or couscous, enriching your dishes with a burst of flavor and nutrition.
The Benefits of Einkorn
Einkorn, one of the oldest grains known to mankind, offers a variety of health benefits. Being rich in protein, fiber, and essential fatty acids, Einkorn contributes to improved digestion and heart health. It also boasts a high mineral content, including magnesium, iron, and zinc, which plays a key role in boosting the immune system and optimizing metabolic function. Moreover, Einkorn’s lower gluten content compared to modern wheat varieties makes it a suitable choice for those with gluten sensitivities.
Does Einkorn need to be shelled?
Yes, Einkorn has a tough outer husk that needs to be removed before consuming. However, the shelling process is relatively simple and can easily be done at home using a mortar and pestle or a grain mill and then shifting through a shifter.
Incorporating Einkorn into Your Diet
Einkorn’s nutty and slightly sweet flavor makes it a versatile ingredient
Einkorn Pancake Recipe
Ingredients:
- 1 cup of Einkorn flour
- 1 teaspoon of baking powder
- 1/2 teaspoon of salt
- 1 tablespoon of sugar
- 3/4 cup of milk
- 1 egg
- 2 tablespoons of melted butter
Instructions:
- In a large bowl, whisk together the Einkorn flour, baking powder, salt, and sugar.
- In another bowl, beat the egg with the milk and melted butter.
- Gradually add the wet mixture to the dry ingredients, mixing just until combined.
- Heat a lightly oiled griddle or frying pan over medium-high heat.
- Scoop the batter onto the griddle, using approximately 1/4 cup for each pancake.
- Cook until bubbles form and the edges are dry. Flip, and cook until browned on the other side.
- Repeat with remaining batter. Serve hot with your favorite toppings.
Including Einkorn in your diet can not only add a unique, nutty flavor to your meals but also enhance their nutritional profile, supporting your journey towards optimal health.
The Benefits of Millet
Millet, a versatile and nutrient-dense grain, is a substantial source of vitamins and minerals, including magnesium, phosphorus, and iron. These nutrients are essential for bone health, metabolism, and red blood cell production. Additionally, millet is a rich source of dietary fiber, promoting good digestive health and potentially aiding in weight management. Millet is gluten-free, making it a great choice for those with celiac disease or those following a gluten-free diet.
Does millet need to be shelled?
Yes, millet needs to be hulled before it can be consumed. The hull is the outer layer of the grain that protects it from pests and environmental factors. This is typically done by machines, so the millet you buy at the store will most likely already be shelled.
How is it shelled traditionally?
Traditionally, millet was hulled by hand using a mortar and pestle. The grains would be placed in the mortar and then pounded with the pestle to remove the hulls. This process can be time-consuming and labor-intensive, which is why machines are now used for commercial production.
Millet Porridge Recipe
Ingredients:
- 1 cup of millet
- 3 cups of water or milk
- 1/4 teaspoon of salt
- 1-2 tablespoons of honey or sugar
- Optional toppings: nuts, seeds, fresh or dried fruits
Instructions:
- Rinse the millet under running water until the water runs clear.
- In a pot, bring the water or milk to a boil.
- Add the rinsed millet and salt to the boiling water, then reduce the heat to low.
- Cover the pot and let it simmer for about 20 minutes, until the millet is tender and the liquid is absorbed.
- Remove from heat and let it sit for a few minutes before fluffing with a fork.
- Stir in the honey or sugar, and add your favorite toppings before serving.
Integrating millet into your diet can provide nutritional benefits and add variety to your meals. Its mild, slightly sweet flavor pairs well with an array of ingredients, allowing for diverse and delicious recipes.
Sorghum: Benefits, Uses, and Recipe
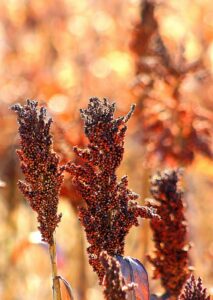
Sorghum is a nutrient-rich grain, gaining popularity due to its myriad health benefits. It is packed with essential nutrients like dietary fiber, protein, and a variety of vitamins and minerals, including niacin, riboflavin, thiamin, magnesium, iron, and phosphorous. Consuming sorghum can aid in improving digestive health, maintaining blood sugar levels, and boosting heart health.
Sorghum’s versatility makes it an excellent choice for various culinary uses. It can be ground into a flour and used in baking, popped like popcorn for a healthy snack, or used as a whole grain in salads, soups, and stews.
Does sorghum need to be hulled?
While some varieties of sorghum do require hulling to remove the outer layer, others can be consumed in their whole form. However, for certain recipes like sorghum flour or popped sorghum, it is recommended to use hulled sorghum for better texture and taste.
Sorghum Salad Recipe
Ingredients:
- 1 cup of sorghum
- 3 cups of water
- 1/4 cup of chopped fresh parsley
- 1 medium cucumber, diced
- 1 medium tomato, diced
- 1/4 cup of feta cheese
- 2 tablespoons of olive oil
- Salt and pepper to taste
Instructions:
- Rinse the sorghum under running water until the water runs clear.
- In a pot, bring the water to a boil.
- Add the rinsed sorghum to the boiling water, then reduce the heat to low.
- Cover the pot and let it simmer for about 50-60 minutes, until the sorghum is tender.
- Remove from heat, drain any remaining water, and let it cool.
- In a large bowl, combine the cooled sorghum, parsley, cucumber, tomato, and feta cheese.
- Drizzle with olive oil, season with salt and pepper, and toss to combine before serving.
Conclusion
In conclusion, ancient wheats offer a world of culinary opportunities and health benefits. From the versatility of sorghum to the myriad of other ancient grains, all are packed with nutrients and can be a part of a healthy, balanced diet. They can be easily incorporated into daily meals, not only enhancing the flavor but enriching the body with essential nutrients. So, don’t hesitate to explore these ancient grains and experience the delight they add to your dining table.
https://pubmed.ncbi.nlm.nih.gov/27687519/
https://pubmed.ncbi.nlm.nih.gov/29497244/
https://pubmed.ncbi.nlm.nih.gov/12690910/
https://pubmed.ncbi.nlm.nih.gov/27729921/