Introduction
Creating the best compost for growing vegetables involves using a balanced mix of green and brown materials, ensuring optimal moisture and aeration, and avoiding contaminants. Proper temperature monitoring also facilitates pathogen-free compost. This nutrient-rich compost improves soil structure and boosts vegetable yield.
Importance of Using Quality Compost for Vegetable Growth
Using quality compost is pivotal for optimal vegetable growth. High-quality compost enriches the soil with essential nutrients, improving its structure and fostering a balanced environment in which plants can thrive. This organic matter enhances soil aeration and water retention, ensuring that roots have access to the moisture and oxygen they need. Additionally, compost supports beneficial microbial activity, which helps break down organic material into forms that plants can readily absorb. By maintaining a nutrient-rich and well-aerated soil, quality compost promotes robust plant health, leading to higher yields and more flavorful vegetables.
Benefits of Composting for Soil Health and Plant Vitality
Composting offers myriad benefits for soil health and plant vitality. One of the primary advantages is the enhancement of soil structure, which improves its ability to hold water and nutrients. By incorporating compost into the soil, you increase its organic matter content, thereby creating a more favorable environment for root growth and microbial activity. This leads to better nutrient exchange and promotes the development of a diverse soil ecosystem. Additionally, compost acts as a natural fertilizer, slowly releasing essential nutrients like nitrogen, phosphorus, and potassium that plants need for growth. This gradual nutrient release ensures that plants receive a steady supply of nourishment, reducing the risk of nutrient leaching and making your garden more sustainable. Furthermore, compost can help to neutralize soil pH, creating a balanced environment that supports a wide variety of vegetables. Overall, regular composting is a sustainable practice that enriches the soil, fosters plant health, and boosts vegetable productivity.
Types of Compost
1. Green Compost
Green compost consists of materials that are rich in nitrogen, which are essential for the composting process as they provide the proteins needed for microbial growth. Common sources of green compost include grass clippings, vegetable scraps, coffee grounds, and fruit peels. These materials decompose quickly and generate heat during the composting process, helping to break down tougher organic matter.
Green compost should be balanced with brown compost materials, which provide carbon and help maintain the proper ratio for effective decomposition. Collecting green compost is fairly straightforward, as many everyday kitchen scraps and yard waste items fall into this category, making it an accessible and practical component of a home composting system.
Benefits and Suitability for Vegetable Gardens
Incorporating green compost into your vegetable garden brings numerous benefits that can enhance crop health and productivity. One of the primary advantages is its ability to improve soil structure, making it more friable and easier for plant roots to penetrate. This results in better root development and increased access to water and nutrients for your vegetables. Additionally, the high nitrogen content in green compost materials provides a quick nutrient boost, which is particularly beneficial for leafy greens and other nitrogen-loving crops.
Moreover, green compost helps to stimulate microbial activity in the soil. These microorganisms play a crucial role in breaking down organic matter and converting it into forms that plants can readily absorb. A robust microbial population also contributes to disease suppression, reducing the likelihood of soil-borne pests and pathogens adversely affecting your garden.
Green compost is also relatively easy to produce and maintain, given that many common kitchen and yard waste items qualify as green materials. This makes it a sustainable and cost-effective option for gardeners looking to reduce waste and promote a cyclic use of resources.
In summary, green compost is highly suitable for vegetable gardens due to its ability to improve soil structure, provide essential nutrients, and enhance microbial activity, resulting in healthier, more productive plants.
2. Brown Compost
Brown compost materials are rich in carbon and play an essential role in balancing the composting process. While green compost provides the necessary nitrogen, brown compost adds the structural support and the carbon necessary for creating a well-balanced compost heap. These materials decompose more slowly than green compost, thus helping to regulate the composting process and prevent it from becoming too wet or odorous.
Common sources of brown compost include dried leaves, straw, cardboard, paper, wood chips, and small branches. Dried leaves are perhaps the most readily available and are excellent for composting. Straw and hay provide good aeration and structure, while cardboard and paper can be shredded to increase the surface area for microbial activity. Wood chips and small branches should be used in moderation due to their slower decomposition rates, but they are valuable for maintaining air pockets within the compost pile, ensuring proper aeration.
By combining brown compost materials with green compost, you create an environment where both carbon and nitrogen are present in ideal ratios. This balance is crucial for fostering the microbial activity necessary for breaking down organic matter efficiently and producing rich, fertile compost for your garden.
Role in Providing Carbon and Improving Soil Structure
Brown compost materials are integral in supplying carbon, an essential element for a balanced compost heap. Carbon-rich materials enable the composting microbes to thrive by providing them with the energy they need to break down organic matter. As the decomposition process unfolds, these materials gradually transform into humus, a dark, nutrient-rich substance that greatly benefits soil structure.
In addition to bolstering microbial activity, the inclusion of brown compost enhances soil structure by improving its aeration, water retention, and drainage capabilities. Well-aerated soil allows plant roots to penetrate more easily, promoting healthier root systems and stronger plant growth. Improved water retention ensures that plants have access to the moisture they need, even during dry periods, while adequate drainage prevents water from pooling and causing root rot.
Overall, the role of brown compost in providing carbon and improving soil structure cannot be overstated. By creating a well-balanced compost heap that includes sufficient brown materials, gardeners can cultivate a rich, fertile soil that supports robust plant life and maximizes garden productivity.
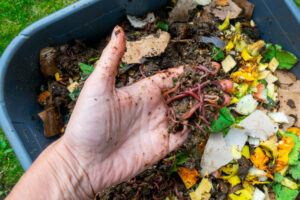
3. Vermicompost
Explanation of Vermicomposting Process
Vermicomposting is the process of using worms, typically red wigglers (Eisenia fetida), to decompose organic waste and produce high-quality compost known as vermicompost. The process begins with setting up a suitable environment for the worms, often in a bin with adequate ventilation and drainage. The bin is filled with bedding material, such as shredded newspaper, cardboard, or coconut coir, which serves as the worms’ habitat and provides initial carbon content.
Organic waste, primarily kitchen scraps like fruit and vegetable peelings, coffee grounds, and eggshells, is added to the bin. It’s crucial to avoid adding oily foods, dairy products, and meat, as these can attract pests and create unpleasant odors. The worms consume the organic matter, breaking it down in their digestive systems and excreting it as nutrient-rich castings.
As the worms process the waste, the bin’s contents gradually transform into vermicompost, a dark, crumbly substance teeming with beneficial microorganisms, enzymes, and nutrients. Regularly harvesting the vermicompost ensures a continuous supply while preventing the bin from becoming overly compacted. Mixing vermicompost with garden soil enhances soil fertility, improves soil structure, and promotes healthy plant growth.
Overall, vermicomposting is an efficient and sustainable method for recycling organic waste into valuable compost, supporting both environmental sustainability and productive gardening.
Nutrient-rich Benefits from Worm Castings
Worm castings, the end product of the vermicomposting process, are a powerhouse of nutrients that can significantly enhance plant growth. These castings contain a balanced blend of essential nutrients, including nitrogen, phosphorus, potassium, calcium, and magnesium, which are readily available for plant uptake. The high content of humus in worm castings improves soil structure, enhancing aeration and water retention, which are crucial for robust root development.
Moreover, worm castings are rich in beneficial microorganisms, such as bacteria and fungi, which help to strengthen plants’ immune systems and suppress harmful pathogens. The presence of these microorganisms also aids in breaking down complex organic substances into simpler forms, making nutrients more accessible to plants. Enzymes found in worm castings, like proteases and amylases, further contribute to nutrient availability by breaking down organic matter in the soil.
In addition to improving nutrient content, worm castings have been shown to enhance seed germination and stimulate plant growth. The natural growth hormones contained within the castings also contribute to healthier and more vigorous plants. By incorporating worm castings into garden soil or potting mixes, gardeners can create a fertile environment that supports sustainable and productive plant growth, ultimately leading to lush, thriving gardens.
4. Manure Compost
Types of Manure Suitable for Composting
The use of manure in composting is a time-tested method for enriching soil with essential nutrients and improving its structure. Not all manures are created equal, and some are more suitable for composting than others. Here are some of the most commonly used types of manure in composting:
1. Cow Manure
Cow manure is one of the most popular choices for composting due to its balanced nutrient profile and availability. It is rich in nitrogen and adds organic matter to the soil, which helps improve soil texture and moisture retention. Composted cow manure is less likely to burn plants, making it a safer option for garden use.
2. Chicken Manure
Chicken manure is highly potent and packed with nitrogen, making it an excellent choice for speeding up the composting process. However, due to its high nitrogen content, it must be composted thoroughly before being used directly on plants, as fresh chicken manure can be too strong and may damage plants.
3. Horse Manure
Horse manure is another commonly used type of manure in composting. It contains a good balance of nutrients and tends to break down relatively quickly. However, it is essential to ensure that the horse manure is free from weed seeds, which can otherwise introduce unwanted plants into the garden.
4. Sheep Manure
Sheep manure is nutrient-rich and has a balanced composition of nitrogen, phosphorus, and potassium. It is also relatively low in odor, making it a favorable option for home composting. Sheep manure, when composted, can be used to enhance soil fertility and promote healthy plant growth.
5. Goat Manure
Goat manure is similar to sheep manure in terms of nutrient content and benefits. It decomposes quickly and can be an excellent addition to the compost pile. Goat manure helps improve soil aeration and structure, contributing to better root growth and overall plant health.
6. Rabbit Manure
Rabbit manure is unique in that it can be used directly on plants without composting, as it does not burn plants. It is incredibly high in nitrogen and phosphate, making it an excellent nutrient source for growing vegetables and flowers. Rabbit manure also helps improve soil texture and water retention.
By selecting the appropriate type of manure and properly composting it, gardeners can create a rich, nutrient-dense compost to enhance their soil and support healthy, productive gardens.
Nutrient Content and Considerations for Use in Vegetable Gardens
Different types of manure offer varying nutrient profiles that can significantly benefit vegetable gardens. For instance, cow and horse manure are well-balanced in nitrogen, phosphorus, and potassium, making them ideal for providing comprehensive nutrition. However, fresh manure should be composted to mitigate the risk of pathogens and to allow the nutrients to become more accessible to plants. Goat and sheep manure, known for their rich nutrient content and low odor, are excellent for enhancing soil fertility and structure. Rabbit manure, with its high nitrogen and phosphate levels, can be applied directly to plants and is particularly beneficial for leafy vegetables, as it boosts their foliage growth. When using any type of manure, it’s crucial to consider the timing of application. Integrating manure into the soil several months before planting allows it to break down fully, preventing nutrient imbalances and ensuring safe, effective use.
Composting Methods
Effective composting methods are essential to convert raw manure into a beneficial soil amendment. Hot composting is a widely-used technique that accelerates the breakdown of manure through high temperatures, which also helps eliminate pathogens and weed seeds. This method requires maintaining a compost pile temperature of 130-160°F for several days. Turning the compost regularly promotes aeration and ensures an even decomposition process. Cold composting, while slower, is another option that involves stacking manure and organic material, allowing them to decompose over time without frequent turning. Another method is vermicomposting, which employs worms to break down manure quickly and efficiently, producing nutrient-rich castings. Selecting the right composting method depends on available resources and the desired time frame for producing a mature compost product. Properly composted manure not only enriches the soil but also supports sustainable gardening practices by recycling organic waste.
1. Traditional Pile Composting
How to Set Up and Maintain a Compost Pile
Setting up a compost pile involves selecting an appropriate location, gathering materials, and maintaining the pile to ensure efficient decomposition. To begin, choose a shaded, well-drained spot that is convenient to access. This will help prevent the compost from drying out too quickly and allow for easy management. Gather a balanced mix of green materials (such as vegetable scraps, grass clippings, and coffee grounds) and brown materials (like dried leaves, straw, and cardboard). Aim for a ratio of about three parts brown to one part green to maintain an optimal carbon-to-nitrogen balance.
Layer the materials starting with coarse brown materials at the bottom to promote airflow, followed by alternating layers of green and brown materials. As you add each layer, moisten the pile to maintain a damp sponge-like consistency. Aeration and moisture are key to a successful compost pile, so turn the pile every few weeks to introduce oxygen and ensure even decomposition. Monitor moisture levels regularly and add water if the pile becomes too dry or more brown materials if it becomes too wet.
Timeframe for Compost Maturation
The time required for compost to mature can vary significantly based on the method used and how well the pile is maintained. Hot composting, with regular turning and consistent temperature management, can produce finished compost in as little as one to three months. Cold composting, on the other hand, typically takes six months to a year due to its slower decomposition rate. Vermicomposting usually falls between the two, with a timeframe of three to six months to produce nutrient-rich castings. Regardless of the method, patience and attention to detail will result in high-quality compost that enriches soil and supports robust plant growth.
2. Compost Bins and Tumblers
Benefits of Using Bins and Tumblers
Using compost bins and tumblers offers several advantages over traditional pile composting. Firstly, they help contain and organize the composting materials, making the process more aesthetically pleasing and reducing the chances of pest infestations. Compost bins and tumblers typically retain heat more effectively, speeding up the decomposition process. Tumblers, in particular, simplify the task of turning the compost, allowing for easier aeration and faster breakdown of materials. Additionally, these contained systems can help manage moisture levels more consistently, preventing the pile from becoming too dry or overly saturated.
Process and Maintenance Tips
To get the most out of compost bins and tumblers, follow these essential process and maintenance tips:
- Location: Place your bin or tumbler in a convenient spot with good drainage and partial sunlight to help maintain optimal temperatures.
- Layering: Continue to layer your compost materials, alternating between greens and browns as you would with a traditional pile.
- Turning: For bins without built-in turning mechanisms, use a garden fork to occasionally mix the compost, ensuring oxygen is evenly distributed. For tumblers, give them a few spins every few days.
- Moisture Control: Regularly check the moisture levels; the compost should feel like a damp sponge. Add water if dry or more brown materials if too wet.
- Temperature Monitoring: Keep an eye on the internal temperature. Ideal composting temperatures range between 135°F to 160°F. If the temperature drops significantly, it may be time to turn the pile.
- Pest Prevention: Securely close bins and tumblers to prevent pests. Avoid adding meat, dairy, or oily foods that might attract unwanted visitors.
By following these tips, you can maximize the efficiency and effectiveness of your composting efforts, resulting in rich, fertile compost to enhance your garden’s soil.
3. Bokashi Composting
Bokashi composting is an anaerobic process that utilizes a mix of microorganisms to ferment food waste, including items that are typically difficult to compost like meat and dairy. This method involves adding food scraps to a special airtight container and covering them with Bokashi bran, which is inoculated with beneficial microbes. The container is kept sealed to maintain the anaerobic environment essential for the fermentation process. Unlike traditional composting, Bokashi does not produce the same odor and can be done indoors, making it suitable for urban environments or those with limited outdoor space.
Process and Maintenance Tips for Bokashi Composting
To successfully implement Bokashi composting, consider the following guidelines:
- Setup: Start with a Bokashi bucket that has a spigot at the bottom to drain excess liquid, known as “Bokashi tea.”
- Layering: Add food waste in small layers, followed by a handful of Bokashi bran. Compress the material to remove as much air as possible.
- Sealing: After each addition, ensure the lid is tightly closed to maintain the anaerobic conditions necessary for fermentation.
- Drainage: Regularly drain the Bokashi tea, which can be diluted and used as a nutrient-rich fertilizer for plants.
- Completion: Once the bucket is full, let it sit sealed for about two weeks to complete the fermentation. The resulting material can then be buried in the garden or added to a traditional compost bin for further decomposition.
- Maintenance: Clean the bucket thoroughly between batches to prevent cross-contamination and ensure the effectiveness of the microorganisms in the next round.
By following these steps, you can efficiently manage food waste and produce a nutrient-dense compost to enrich your garden soil.
Advantages for Integrating Kitchen Waste into Compost
Incorporating kitchen waste into compost offers several significant advantages:
- Reduction of Landfill Waste: By diverting kitchen scraps from landfills, we minimize the volume of waste that contributes to landfill overflow. This reduction helps decrease methane emissions, a potent greenhouse gas produced when organic matter decomposes anaerobically in landfills.
- Nutrient-Rich Soil Amendment: Kitchen waste is often rich in nutrients such as nitrogen, potassium, and phosphorus. When composted, these nutrients return to the soil, enhancing its fertility and promoting healthy plant growth.
- Cost Savings: Composting kitchen waste reduces the need for chemical fertilizers, which can be expensive. By creating your compost, you can produce a high-quality soil amendment at a fraction of the cost.
- Soil Health Improvement: Compost improves soil structure, increasing its ability to retain moisture and enhancing aeration. This leads to healthier plant roots and more resilient crop growth.
- Environmental Benefits: Composting helps close the loop of the food cycle, promoting a circular economy. It contributes to sustainable agricultural practices by recycling organic matter back into the ecosystem.
By integrating kitchen waste into compost, we not only manage waste more effectively but also reap substantial environmental and economic benefits.
Best Practices for Using Compost
Timing and Application Techniques for Incorporating Compost into Vegetable Gardens
Timing
For the best results, it is crucial to apply compost at the right time in your gardening schedule. Ideally, compost should be added to vegetable gardens at the beginning of the growing season, usually in early spring. This timing allows the compost to integrate fully into the soil, providing essential nutrients just as plants begin to grow. Additionally, applying compost in the fall, after you have harvested your vegetables, can also be beneficial. This gives the compost time to break down further and enrich the soil in preparation for the next planting season.
Application Techniques
- Top-Dressing: One of the simplest methods of applying compost is top-dressing. Spread a layer of compost, about 2-3 inches thick, over the surface of your garden beds. This method is excellent for providing a nutrient boost throughout the growing season.
- Incorporation into Soil: For a more integrated approach, mix compost directly into the top 6-8 inches of soil. This can be done using a garden fork, hoe, or tiller. This technique ensures that the compost interacts with the root zone of your plants, offering a consistent supply of nutrients.
- Side-Dressing: For established plants, side-dressing involves placing compost around the base of each plant. This method is ideal for giving plants an additional nutrient boost during critical growth periods, such as flowering or fruiting.
- Compost Tea: Another innovative application technique is using compost to make a nutrient-rich liquid known as compost tea. This can be sprayed directly onto plant leaves or applied to the soil. Compost tea provides a quick nutrient boost and can help suppress plant diseases.
Adopting these timing and application techniques will maximize the benefits of compost, leading to a more productive and sustainable vegetable garden.
Quantity of Compost Needed Per Square Foot
Determining the right amount of compost is crucial for achieving optimal soil health without overwhelming your plants. A general recommendation is to apply a layer of compost that is 1-2 inches thick for most garden beds. This translates to approximately 3-6 cubic feet of compost per 100 square feet of garden space. For top-dressing, a lighter application of 1 inch is typically sufficient, while incorporating compost into the soil may require up to 2 inches to ensure thorough mixing and adequate nutrient distribution. If using compost tea, dilute it according to the specific instructions, as too concentrated a solution can harm plant roots and foliage. Adjusting the amount based on the specific needs of your soil and plants will help create a thriving, productive garden.
Tips for Mixing Compost with Garden Soil
- Test Your Soil: Before adding compost, conduct a soil test to determine its current nutrient levels and pH. This will help you understand how much compost is needed and whether any additional soil amendments are required.
- Prepare the Area: Clear the garden bed of any weeds, rocks, or debris. This ensures that compost can be evenly mixed into the soil without any obstacles.
- Use the Right Tools: Equip yourself with the appropriate tools, such as a garden fork, spade, or tiller. These tools make it easier to mix compost into the soil thoroughly.
- Layer the Compost: Spread the compost evenly over the soil surface. For best results, apply a 1-2 inch thick layer of compost to the top of the soil.
- Mix Thoroughly: Use your garden fork, spade, or tiller to mix the compost into the top 6-8 inches of soil. Thorough mixing ensures that the nutrients from the compost are well-distributed, promoting healthy root growth.
- Water Well: After mixing the compost into the soil, water the area thoroughly. This helps to settle the compost and soil, and initiates the breakdown of organic matter.
- Allow Time for Decomposition: If you’re preparing a garden bed well in advance of planting, mix the compost several weeks before planting. This allows time for the compost to fully integrate with the soil and stabilize.
- Monitor and Adjust: After your initial application, regularly check your soil and plant health. Add more compost as needed to maintain soil fertility and structure, especially during the growing season.
By following these tips, you can create a nutrient-rich, well-structured garden soil that supports healthy plant growth and enhances the overall productivity of your vegetable garden.
Common Pitfalls and Solutions
Identifying and Correcting Compost Imbalances
- Too Much Nitrogen:
- Symptoms: Plants exhibit excessive leafy growth but produce little to no flowers or fruit. The compost pile may also emit a strong ammonia odor.
- Solution: Balance the nitrogen-rich materials (e.g., grass clippings, kitchen scraps) with carbon-rich materials (e.g., dry leaves, straw). Aim for a ratio of roughly 30 parts carbon to 1 part nitrogen. Incorporate browns like shredded cardboard or sawdust to absorb excess nitrogen and restore balance.
- Not Enough Aeration:
- Symptoms: The compost pile becomes compacted, smelly, and slow to decompose. It may develop an unpleasant odor of rotten eggs.
- Solution: Regularly turn the compost to introduce air and prevent compaction. Ensure materials are layered properly and consider adding bulky items like wood chips to increase airflow. Aim to turn the pile every week or two to maintain good aeration.
- Too Much Moisture:
- Symptoms: The compost pile is soggy, emits an unpleasant smell, and decomposes slowly.
- Solution: Add dry, absorbent materials like straw, shredded paper, or dry leaves to soak up excess moisture. Also, ensure the compost pile is covered during heavy rains and has proper drainage.
- Too Little Moisture:
- Symptoms: The compost pile is dry, crumbly, and fails to heat up or decompose properly.
- Solution: Regularly sprinkle water over the compost to maintain a moisture level similar to a wrung-out sponge. Be cautious not to oversaturate, as this can lead to other issues such as lack of aeration.
- Imbalanced pH Levels:
- Symptoms: Compost pH levels become either too acidic or too alkaline, inhibiting microbial activity and affecting soil quality.
- Solution: To correct overly acidic compost, add crushed limestone or wood ash. For overly alkaline compost, integrate acidic materials like pine needles or coffee grounds. Regular pH testing can help monitor and maintain optimal levels.
By identifying and addressing these common compost imbalances, you can create a well-balanced and effective compost that fosters a healthier and more productive garden.
Troubleshooting Common Composting Problems
Composting is a beneficial practice for both garden and the environment, but occasionally, issues can arise that hinder the process. Here are some common composting problems and how to troubleshoot them:
Unwanted Pests or Rodents:
Symptoms: Presence of animals such as rats, raccoons, or insects within or around your compost pile.
Solution: Avoid adding meat, dairy, or oily foods to your compost as these attract pests. Ensure your compost bin is secure and covered. If pests persist, consider using a more enclosed compost system or adding a layer of soil on top of food scraps to deter scavengers.
Compost Pile is Too Cold:
Symptoms: Lack of heat generation within the compost, resulting in slow decomposition.
Solution: Check that your compost pile has the correct balance of green (nitrogen-rich) and brown (carbon-rich) materials, and add more greens if necessary. Turn the pile frequently to aerate it and consider covering the compost to retain heat, especially during colder months.
Finished Compost is Clumpy or Foul-Smelling:
Symptoms: End product is not crumbly and has a bad odor, indicating improper breakdown of materials.
Solution: Allow the compost more time to mature. Ensure the composting materials were adequately mixed and aerated. The inclusion of some mature compost or compost activators can help speed up the decomposition process. Sift out large chunks and return them to the active pile.
Presence of Weed Seeds:
Symptoms: Finished compost contains seeds from weeds or other undesirable plants, leading to unwanted growth when used.
Solution: Maintain higher temperatures in the compost pile to kill weed seeds. Ensure a proper mixing of materials to encourage uniform heating, and avoid adding weeds that have gone to seed directly into the compost.
Properly dealing with these common issues will ensure that your composting efforts result in rich, fertile compost that benefits your garden and contributes to a sustainable environment.
Compost Pile is Too Dry:
Symptoms: The compost pile is dry to the touch, materials are not decomposing, and there is little to no microbial activity.
Solution: Gradually add water to the compost pile, ensuring even distribution without making it soggy. Aim for a moisture level akin to a damp sponge. Increase the amount of green (nitrogen-rich) materials, which have higher moisture content, such as fresh grass clippings or kitchen scraps. Cover the pile with a tarp or other cover to prevent moisture loss and reduce evaporation, especially in hot or windy conditions. Regularly turning the pile can also help to integrate moisture and enhance decomposition.
Conclusion
Recap and Encouragement
Key Points on Choosing and Making the Best Compost for Vegetable Gardening
- Balance of Ingredients: Ensure a proper mix of green (nitrogen-rich) and brown (carbon-rich) materials. This creates an ideal environment for microorganisms to thrive and break down the organic matter.
- Optimal Conditions: Maintain the right levels of moisture and aeration. The pile should be as damp as a wrung-out sponge and turned regularly to introduce oxygen.
- Avoid Contaminants: Exclude any materials that may introduce toxins or unwanted seeds into your compost. Avoid adding diseased plants, meat, and dairy products to prevent pest attraction and undesired microbial growth.
- Temperature Monitoring: For safe and efficient decomposition, maintain the compost pile at a higher temperature. This helps in killing pathogens and weed seeds, ensuring a cleaner final product.
- Patience and Attention: Composting is a gradual process, requiring monitoring and occasional adjustments to meet changing conditions and to solve common issues such as foul odors or slow decomposition.
Encouragement to Start Composting
Composting is a rewarding and environmentally friendly practice that transforms organic waste into rich, fertile soil. By starting your composting journey, you’ll reduce household waste and improve your vegetable garden’s productivity and health. Whether you’re a seasoned gardener or a beginner, composting offers numerous benefits, from enhancing soil structure and adding nutrients to fostering a more sustainable lifestyle. So, why not start composting today and reap the rewards of a greener, more bountiful garden? Your plants—and the planet—will thank you!