Growing Cauliflower from seed to harvest is straight forward. Prepare the seedbed with compost to enrich the soil for better yield. Sow seeds indoors approximately 4-6 weeks before the last frost date. Once the seedlings develop 2-3 true leaves, they can be hardened off and transplanted to the garden. Regular watering, mulching, and fertilizing will ensure healthy growth. For more detailed info read on.
Introduction
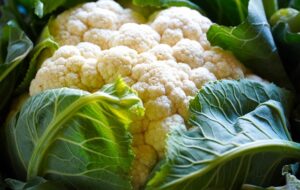
Cauliflower is a versatile and nutritious vegetable that belongs to the Brassica genus, which includes broccoli, kale, and cabbage. This cool-season crop is cherished for its dense, edible heads, known as curds, which come in a variety of colors ranging from traditional white to vibrant purples and greens. As a garden vegetable, cauliflower provides an excellent source of vitamins and minerals, and is a favorite among gardeners for its unique taste and presentation. Although it can be slightly more challenging to grow than its relatives due to its sensitivity to temperature changes, with the right care, cauliflower can be a rewarding addition to any home garden.
Benefits of Growing Cauliflower
Growing cauliflower in your own garden offers numerous benefits that extend beyond the simple satisfaction of cultivating your own food. Firstly, home-grown cauliflower tends to be more flavorful and nutrient-rich compared to store-bought alternatives, which often lose some of their vital nutrients during transport and storage. Moreover, cultivating your own cauliflower allows you to control the use of chemicals and pesticides, resulting in cleaner, more organic produce. Gardening itself, including the cultivation of cauliflower, can be a therapeutic activity that reduces stress and promotes a sense of well-being. Lastly, cauliflower’s broad leaves provide ground shade, which can help in reducing weed growth, conserving soil moisture, and keeping the soil cooler, ultimately contributing to the garden’s ecosystem.
Choosing Your Seeds
When venturing into the cultivation of cauliflower, selecting the right seeds is crucial for a successful harvest. A diverse array of cauliflower varieties exists, each with unique characteristics and advantages. Some popular types include ‘Snowball’, which produces classic white curds, and ‘Purple Cape’, known for its stunning purple florets which are rich in antioxidants. Additionally, ‘Cheddar’ offers curds with a yellow hue and a hint of nuttiness in flavor, while ‘Romanesco’ stands out with its spiraled lime-green curds.
Before settling on a particular variety, consider your local climate conditions. Some types are heat-tolerant and suitable for warmer regions, while others may require the cooler temperatures of the late season to thrive. It’s equally important to look for seeds that are resistant to common diseases that affect cauliflower such as downy mildew and clubroot. By selecting seeds that are adapted to your growing conditions and are less prone to disease, you can minimize the need for chemical treatments and ensure a healthier, more organic produce.
Planting Cauliflower
When to Plant Cauliflower Seeds
The timing for planting cauliflower seeds is critical to your crop’s success. In most regions, seeds should be started indoors 4 to 6 weeks before the last frost date. Transplant seedlings outside when they are 4 to 6 inches tall and have at least four true leaves, which is typically 2 to 4 weeks before the last forecasted frost. For a fall harvest, start your seeds in mid to late summer so they can mature in the cooler fall months.
Soil Preparation and Conditions
Cauliflower demands well-drained, fertile soil with a pH between 6.5 and 7. Before planting, enrich your soil with a blend of compost or well-rotted manure to ensure high nutrient levels, which cauliflower plants require. The soil should also be well-tilled to allow for proper root growth. Moisture retention is essential, so adding organic material can improve the soil structure and water-holding capacity. Consistent moisture is a must, so ensure your planting site can be watered easily during dry spells.
Seed Spacing and Planting Depth
When transplanting cauliflower seedlings, space them about 18 to 24 inches apart in rows, with rows spaced 30 inches apart. This spacing allows adequate room for growth and air circulation, which can help prevent disease. Plant the seeds about 1/4 to 1/2 inch deep in the soil. When dealing with seedlings, the top of the root ball should be level with the ground. Press the soil gently around the roots to eliminate air pockets and water thoroughly after planting to settle the soil.
Caring for Your Cauliflower Plants
Watering Requirements
Cauliflower plants require steady moisture for the development of their distinctive heads. It’s recommended to supply approximately 1 to 1.5 inches of water weekly, whether from natural rainfall or irrigation. Utilizing a soaker hose or drip irrigation system can efficiently direct water to the roots, reducing evaporation and avoiding wet foliage, which might cause diseases to thrive.
Mulching and Weed Control
Mulching around your cauliflower plants serves various purposes. It aids in retaining soil moisture, regulating soil temperature, and inhibiting weed growth that competes for nutrients. Opt for organic mulches like straw or grass clippings as they decompose gradually, enriching soil fertility. Stay vigilant in promptly removing any emerging weeds to maintain control over the planting area.
The Importance of Fertilizing
While the compost or well-rotted manure added during soil preparation provides a strong start for your cauliflower, additional fertilization may be necessary. A balanced fertilizer can be applied according to package instructions, usually when the plants are about half-grown. This ensures that they have enough nutrients to develop large, robust heads. Over-fertilizing, however, can lead to leafy growth at the expense of the cauliflower head, so moderation is key.
Pest and Disease Management
Regularly inspect your cauliflower plants for signs of pests and diseases. Common culprits include aphids, flea beetles, and cabbage loopers. Organic options like neem oil can be effective for pest control, and encouraging beneficial insects such as ladybugs and lacewings helps maintain ecological balance. Diseases such as powdery mildew and black rot can be minimized by ensuring good air circulation and crop rotation. Promptly remove any diseased plants to prevent spread to healthy ones.
Cauliflower Growth Stages
Germination
Cauliflower seeds will typically germinate within 5 to 10 days when sown in fertile, well-drained soil and kept consistently moist. Ideal germination temperatures range between 65 and 70 degrees Fahrenheit. It’s critical to monitor soil moisture during this period to establish a strong root system.
Seedling Stage
After germination, seedlings require adequate light and water to continue their development. Thin the seedlings to prevent overcrowding and ensure the strongest plants can thrive. This early stage is crucial for building a robust framework for future growth.
Vegetative Stage
As the seedlings mature into the vegetative stage, their root systems expand and foliage increases. This is the time for plants to build reserves of nutrients and water, setting the stage for eventual curd development. Regular watering, balanced fertilization, and weed control remain top priorities.
Curd Development
The cauliflower curd, or head, begins to form after the vegetative stage. At this point, the plant should not lack for nutrients or water, as any stress can impact the quality of the curd. The head will typically start as a small, tight cluster that gradually enlarges.
When to Blanch Cauliflower Heads
Blanching is a technique used to protect the cauliflower head from sunlight to preserve its white color and tender quality. When the head is about 2 to 3 inches in diameter, gather the outer leaves and secure them over the curd using a rubber band or twine. This process should be done carefully to avoid snapping the leaves but ensure the head is covered to prevent the development of a yellow cast and a coarse texture.
Harvest Timing and Techniques for Cauliflower
Identifying Harvest Readiness
The ideal time to harvest cauliflower is when the curd, or head, is fully developed but still compact and firm, usually ranging from 6 to 8 inches in diameter. The surface of the curd should be smooth and uniform in color, with the florets tightly clustered and not showing signs of separating or flowering. Timing is crucial; if left too long, the curd will begin to spread out, rice, or develop a coarse texture.
Harvesting Techniques
To harvest cauliflower, use a sharp knife and cut the stem beneath the head, leaving a few surrounding leaves attached. This will help protect the curd and keep it clean. It’s best to harvest in the cool part of the day to ensure the curd remains firm and hydrated. If you’re growing multiple cauliflowers, harvest them in stages as each head reaches the desired size to maintain a steady supply. After harvesting, the cauliflower head can either be consumed fresh or stored in a refrigerator where it can keep for up to a week.
Post-Harvest Handling of Cauliflower
Cleaning and Preparing for Storage
After harvesting your cauliflower, it is important to clean it properly to remove any soil or garden debris. Gently rinse the head under cool, running water and pat dry with a clean cloth or paper towel. Check for any insects or damaged areas and remove these before storage.
Refrigeration and Freezing Methods
For refrigeration, wrap the cauliflower head in a damp paper towel and place it in a perforated plastic bag or a produce drawer to maintain humidity. This will help the cauliflower to stay fresh for up to a week. For longer storage, freezing is an option. First, cut the head into florets and blanch them in boiling water for about three minutes, followed by an immediate transfer to ice water to halt the cooking process. Once cooled, drain the florets well and spread them out on a baking sheet to freeze individually. After they are frozen, pack the florets into airtight containers or freezer bags. Frozen cauliflower can last for up to eight months, ensuring you can enjoy your garden’s bounty well beyond the growing season.
Troubleshooting Common Problems Growing Cauliflower
Dealing with Pests and Diseases
Pests like aphids and cabbage worms can be a nuisance to cauliflower growers. To manage these pests, introduce beneficial insects like ladybugs or use organic pesticides that are safe for edible plants. For diseases such as powdery mildew or black rot, ensure proper air circulation around your plants and practice crop rotation to prevent soil-borne illnesses. Remove infected leaves immediately to keep the disease from spreading.
Addressing Nutritional Deficiencies
Yellowing leaves may indicate a deficiency in essential nutrients like nitrogen, potassium, or magnesium. To counteract this, conduct a soil test to identify specific nutrient deficiencies and amend the soil accordingly with organic compost or a balanced, slow-release fertilizer designed for vegetable crops.
Environmental Stressors
Cauliflower is sensitive to environmental stressors; extreme temperatures can cause bolting, while inconsistent watering can lead to malformed heads. To mitigate temperature effects, use row covers during unexpected cold snaps or hot periods. Maintain a consistent watering schedule, ensuring the soil is moist but well-drained, to avoid both drought stress and root rot.
Conclusion
In summary, successful cauliflower cultivation hinges on a few key practices. Start by selecting a variety suited to your climate and plant it in well-draining soil. Freezing florets individually allows you to enjoy them long after harvesting. Combat pests with beneficial insects and use organic pesticides when necessary. A soil test can guide you in correcting any nutritional deficiencies. Protect your plants from extreme weather with row covers, and maintain consistent watering to prevent stress. With these strategies, you can look forward to a healthy and productive crop.
Harvest time brings with it the satisfaction of enjoying the literal fruits of your labor. As you savor the crisp taste of home-grown cauliflower, remember that each bite represents the culmination of dedication and care. So go ahead, treasure every meal, and share your harvest with friends and family. Happy gardening!
“`