Growing Peppermint:Introduction
Peppermint, scientifically known as Mentha piperita, is a perennial herb treasured for its distinctive aroma and medicinal value. Native to Europe and Asia, this fast-growing plant is now widespread across the globe, making it a popular choice for home gardeners.
The importance and uses of peppermint are manifold. It serves predominantly in the culinary world as a flavoring agent in foods and beverages. However, its applications go beyond gastronomy. In the healthcare realm, it’s used as a calming and numbing agent, helping to relieve muscle pain, headaches, and digestive issues. The essential oil derived from peppermint leaves is also a key ingredient in cosmetics, soaps, and perfumes, contributing a refreshing scent. Growing your peppermint can offer you an easily accessible, all-natural supply for these various uses. By following this guide, you’ll be on your path to successfully cultivating this versatile herb.
Botany of Peppermint
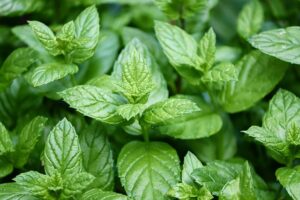
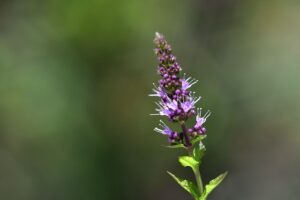
Peppermint belongs to the Lamiaceae family and is a hybrid, a cross between watermint and spearmint. This herbaceous rhizomatous perennial plant typically grows to a height of 12 to 35 inches. Its square stem is smooth and of a dark purple hue, bearing opposite, lanceolate leaves that are dark green with reddish veins. The leaves, about 2 to 3.5 inches long, are characteristically aromatic due to the presence of essential oils. From July to August, it produces terminal spikes of small, purple flowers, attracting a variety of pollinators. The plant’s rhizomes, or underground stems, allow it to spread rapidly, often leading to dense colonies in the wild.
Cultivars of Peppermint
Peppermint has numerous cultivars, each with unique characteristics and uses.
- Mentha x piperita ‘Chocolate Mint’ is a popular cultivar known for its distinct chocolatey aroma, making it a favorite in dessert recipes.
- Mentha x piperita ‘Crispa’ variety, on the other hand, is often used for its therapeutic properties in relieving digestive issues.
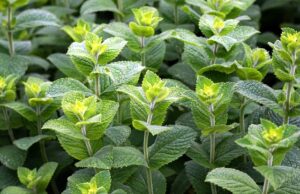
- Mentha x piperita ‘Variegata’, is recognized for its striking variegated leaves that are both a visual and aromatic delight.
- Mentha x piperita ‘Citrata’ is loved for its citrusy scent and is commonly used in natural cosmetics and soaps.
- mentha x piperita ‘Lime Mint’ blends the refreshing scents of lime and mint, popular in both culinary and aromatic uses.
Preparation for Planting Peppermint
Choosing the right location
When deciding where to plant your peppermint, keep in mind that this herb thrives in areas receiving partial to full sunlight. While it can tolerate a bit of shade, too much can impede its growth and diminish its aromatic potency. Choose a spot in your garden where it will get ample sunlight for the majority of the day. Peppermint is very hardy and spreads easily so be careful where you plant it. It will grow easily in pots if you keep it watered and this has the added benefit of preventing its spread by root runners.
Preparing the soil
Peppermint prefers well-drained soil with a pH range between 6.0 and 7.0. It is not particularly picky about soil types; however, it performs best in rich, loamy soil. Amend your soil with organic matter to improve its fertility and drainage. A soil test can help you determine the pH level; if it’s on the acidic side, adding lime can help bring it toward neutrality. Avoid areas with clayey or waterlogged soil as these conditions can cause root rot.
Planting Peppermint
Peppermint can be planted in either the spring or the autumn. Spring planting allows the mint to establish its roots before the hot summer months, while autumn planting provides a head-start for growth in the following spring.
How to Plant
From Seed
Peppermint seeds can be sown directly onto the soil surface and lightly covered with compost. Keep the soil consistently moist until germination, which usually takes 10-15 days.
From Cuttings
To propagate peppermint from cuttings, select a healthy, vigorous stem from an established plant. Cut a 4-6 inch piece, making the cut just below a node (where the leaves meet the stem). Remove the leaves from the bottom half of the cutting, then insert it into a pot filled with well-drained soil. Keep the soil moist until new growth appears, indicating that the cutting has rooted.
From Transplants
Transplanting is another effective way to grow peppermint. Dig a hole twice the diameter and depth of the root ball of your transplant. Place the plant in the hole, ensuring the top of the root ball is level with the soil surface. Backfill the hole with soil, firming it gently around the transplant. Water thoroughly after planting.
Care & Maintenance
Watering
Peppermint requires regular watering to thrive, but care must be taken to avoid waterlogged soil. This can be managed by allowing the top inch of soil to dry out before the next watering. Installing a drainage system can also be beneficial in keeping the soil moist but not soggy.
Fertilizing
A balanced, all-purpose fertilizer is recommended for peppermint plants. Apply according to the package directions, generally once a month during the growing season. Fertilizing helps replenish nutrients in the soil, promoting healthy growth and robust flavor in your peppermint.
Harvesting
When to Harvest
For optimal flavor, it is best to harvest peppermint just before the plant flowers. This is typically in the late spring or early summer, but growth patterns can vary based on geographic location and climate conditions.
How to Harvest
Harvesting peppermint involves cutting the stems near the base of the plant. It is essential to leave some stems behind to allow for regrowth. Using a sharp, clean pair of garden shears or scissors, make your cuts just above a node or set of leaves. This promotes new growth and ensures the continued health of your peppermint plant.
Storing
Short-Term Storage
For short-term storage, freshly harvested peppermint leaves can be placed in a glass of water much like a bouquet of flowers. Ensure the leaves are above the water level to prevent rotting. Alternatively, peppermint can be stored in a plastic bag in the refrigerator. This method can keep the leaves fresh for up to a week.
Long-Term Storage
For long-term storage, drying is the best method. After washing and drying the peppermint leaves, lay them flat on a clean, dry surface out of direct sunlight. Once completely dried, which may take a week or more, store the leaves in an airtight container and keep in a cool, dark place. Your peppermint leaves are now ready for use throughout the year.
Conclusion
In conclusion, cultivating, harvesting, and storing your peppermint plant is an engaging and rewarding process. It not only supplies fresh, flavorful peppermint at your fingertips but also helps create a connection with nature. By following the guidelines for planting, fertilizing, harvesting, and storing, you can ensure a plentiful and continuous supply of peppermint for your culinary and medicinal needs. Remember, patience and attentiveness are key in this endeavor. Happy gardening!
To recap, the process of cultivating your peppermint plant involves several crucial steps: planting, fertilizing, harvesting, and storing. Each step requires careful attention to ensure the health and prosperity of your plant. Short-term and long-term storage methods allow you to enjoy the fresh, invigorating taste of your homegrown peppermint throughout the year.
Embarking on this peppermint growing journey not only provides a sense of satisfaction from nurturing a plant from its initial stages to full bloom but also encourages a deeper understanding and appreciation of nature. So, why wait? Grab your gardening tools, and set forth on this exciting and rewarding journey of growing your very own peppermint plant. Your culinary and medicinal endeavors will thank you for it!
For more information on the benefits of peppermint click here.
For more info on the medicinal properties of herbs click here
For information on home remedies click here.