If you’re interested in learning how to can meat, it involves preparing fresh meat, packing it into sterilized jars, adding salt for taste, and processing in a pressure canner at the right weight and duration. For more detailed instruction read on.
Introduction
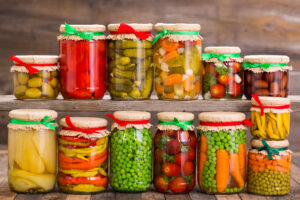
Home canning meat is a traditional preservation method that has sustained families with nutrient-rich food all year round. This process involves cooking, packing, and sealing meat in glass jars to extend its shelf life while maintaining its flavor and nutritional value. By controlling the environment in which the meat is stored, home canning prevents bacteria, yeast, and mold growth, ensuring the safety and quality of the meat. It’s an economical and sustainable practice that eliminates the need for refrigeration, thus making it a reliable option for long-term storage of meat products. This article is about how to can meat.
Benefits of Home Canning
Home canning meat comes with a host of benefits that make it worth considering. First and foremost, it provides a healthier alternative to store-bought canned meat, which often contains preservatives and additives. Homemade canned meat retains the nutritional value of fresh meat and allows for better control over the quality and ingredients. Secondly, it is economical. Buying meat in bulk during sales and preserving it at home can significantly cut down your grocery bills. Also, home canning meat is environmentally friendly as it reduces dependence on commercially packaged products and their associated plastic waste. It also offers convenience; canned meat is ready to use, saving cooking time during meal preparation. Lastly, home canning meat is a method of long-term preservation that can yield a stockpile of ready-to-eat meals, which is especially useful in emergencies.
Before diving into the home canning process, you’ll need to gather some essential equipment. This will ensure that the canning process is smooth and efficient, and your meat is safely preserved.

Equipment
- Canning jars
- Pressure cooker or boiling water bath
- Canning funnel and ladle
- Jar lifter, magnetic lid lifter and kitchen tongs
- Kitchen timer or stopwatch
- Clean cloths/towels for wiping rims of the jars when canning is complete.
Canning Jars and Lids: These are the containers where you’ll store your meat. Ensure they are specifically designed for canning and that they come with a two-piece vacuum cap (a flat lid and a screw band).
Pressure Canner: This is a must-have for home canning meats as it ensures the temperature reaches high enough to kill all bacteria, making the food safe for long-term storage.
Jar Lifter: This tool is used to safely handle hot jars, protecting you from accidental burns.
Canning Funnel: This helps in transferring meat into the jars in a cleaner, more efficient way.
Meat Thermometer: This ensures your meat reaches the necessary temperature before canning.
Cutting Board: You’ll need a sturdy cutting board for prepping your meat for canning. It’s advisable to have one specifically for meats to avoid cross-contamination.
Remember, it’s crucial to keep all your equipment clean and sanitized to prevent any bacterial contamination.### Choosing and Purchasing Meat
When selecting meat for canning, both quality and freshness are paramount. Opt for lean cuts as fat can affect preservation quality. Freshly butchered meat is the best choice but if that’s not feasible, ensure the meat you purchase is thoroughly refrigerated and used within a couple of days. Always prefer reputed butchers or grocery stores, as they are more likely to follow stringent safety and quality standards.
Cleaning and Sanitizing Equipment
The importance of cleanliness can’t be stressed enough in the canning process. All equipment should be washed with warm, soapy water and rinsed thoroughly. Once cleaned, jars should be kept hot until they’re ready to use, to prevent them from breaking when filled with hot food. Lids and bands can be kept at room temperature. To sanitize, you can boil the jars for ten minutes (adjusting the time for altitude). Alternatively, you could use a dishwasher if it has a ‘sanitize’ mode.
Preparing Meat for Canning: How to Can Meat
Proper preparation is necessary to ensure the safety and quality of canned meat. First, trim off excess fat and any bruised or discolored areas. Then, cut the meat into suitable sizes that fit into your canning jars. For raw packing, you can directly pack the raw meat into jars. For hot packing, precook the meat by roasting, stewing, or browning in a skillet until about two-thirds done, then pack it into the jars along with some boiling broth, meat drippings, water, or tomato juice.
This article belongs to pineyriverhomestead.com Published 9-19-23
Adding Salt and Water
Salt is a key ingredient in canning meat. It helps to preserve flavor and prevents spoilage. The most common solution used in home canning is a brine, made of salt and water. To make the solution, dissolve 2 tablespoon of non-iodized salt into 2 cups of warm water until it’s thoroughly mixed and no more salt will dissolve.
How Much Head Room
When filling jars with food for canning, be sure to leave about 1 inch of headroom to allow the food to expand during processing. The exact amount will vary depending on the recipe and type of food being canned. It’s important to follow directions exactly when preparing and canning meat, as even minor variations in the process may lead to unsatisfactory results or even spoilage.
Using a Pressure Canner
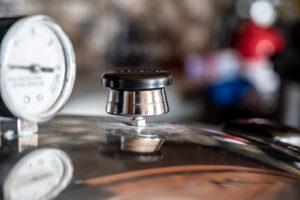
When canning meat, it’s important to use a pressure canner. Pressure canners operate at higher temperatures and atmospheric pressures than boiling water bath canners, which helps kill any bacteria or microorganisms present in the food that may cause spoilage. When using a pressure canner, always follow the manufacturer’s instructions. If you are unsure of how to use it, consult your local county extension office or the National Center for Home Canning. You can often find a instruction booklet online for your canner if you have misplaced yours. you just need to find your model number which should be somewhere on the canner.
For more info on using a pressure canner check these resources:
https://nchfp.uga.edu/publications/uga/using_press_canners.html#gsc.tab=0
https://pineyriverhomestead.com/how-to-pressure-can-a-guide-for-beginners/
Below are Amazon links to two pressure canners. I own the Presto and it works fine. I’d love to own the All American which has no rubber seal to break down or need replacement but it’s a bit pricy. It cost you no more to buy through the link but does support the channel so check it out if you are interested in a canner.
Presto 01755 16-Quart Aluminum canner Pressure Cooker, One Size, Silver
All American 1930: 21.5qt Pressure Cooker/Canner (The 921) – Exclusive Metal-to-Metal Sealing System – Easy to Open & Close – Suitable for Gas, Electric, or Flat Top Stoves – Made in the USA
When to Start Timing Processing
Timing for meat canning begins when the pot of jars and contents has come to a full boil. Boil for the amount of time specified by your recipe, then turn off the heat and begin counting down the processing time. Be sure to process in a covered pot so that no steam escapes and the meat is subjected to an even amount of heat.
Checking for Proper Seal
After processing, remove the jars and allow them to cool completely before testing for a good seal. To do this, press gently on the lid of each jar. If it’s sealed properly, the lid will not move at all. If there is any give in the lid, the seal is not good and the food should be reprocessed or stored in the refrigerator for immediate use.
Safety Guidelines
Safety is a paramount factor when it comes to canning meat. Always ensure your hands, utensils, and work surfaces are clean to prevent contamination. Meat should be fresh, refrigerated, and handled promptly to sustain its quality. When using a pressure canner, regularly check its gasket and safety valves for any signs of wear or damage. Meat, chicken and fish can only be pressure canned.
Ensure that the jars, lids, and bands are properly sterilized before use and are free from any chips or cracks. Always use a jar lifter when handling hot jars and never tighten the bands too tightly as it can interfere with the sealing process.
Moreover, never consume canned food if the jar is leaking, has bulging lids, or gives off a foul odor. When in doubt, throw it out. Finally, always store your canned goods in a cool, dark place and consume within a year for the best flavor and nutritional value.
Be aware you are working with very high temperature water under pressure and take all precautions to avoid burning yourself.
Conclusion
Home canning is a great way to preserve food and enjoy it for months to come. With the right equipment and processes, you can safely seal jars of meat that will last for up to a year. However, safety should always be your top priority when handling hot water and high-pressure vessels. Follow all guidelines closely, inspect your jars for proper sealing, and properly store your canned goods to ensure good quality. With the right technique, you’ll be sure to enjoy delicious home-canned meats all year long!
Happy canning!
For info on waterbath canning check here.
For info on fermenting check here.
For more on general canning check here.
Resource: https://www.nifa.usda.gov/about-nifa/blogs/usdas-complete-guide-home-canning
