How to Grow Chamomile
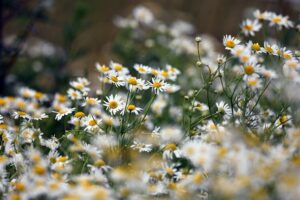
Learning how to grow chamomile, with its dainty daisy-like flowers and aromatic foliage, is relatively straightforward. Chamomile is not a fussy plant once established but just tossing the seeds on the ground probably won’t work. I tried that. It did come up but could not survive the surrounding competition.
Types of Chamomile
The two main types of chamomile generally used for medicinal purposes are German chamomile (Chamomilla recutita) and Roman chamomile (Chamaemelum nobile). German chamomile is best suited to temperate climates, while Roman chamomile prefers cooler climates. The flowers and chemical components of both are similar, and both are often used for medicinal purposes. German Chamomile is an annual but self-seeds so well it often acts like its perennial cousin Roman Chamomile that spreads by rhizomes.
Soil Requirements for Growing Chamomile
Chamomile will do well in almost any soil as long as it’s well-drained and not overly rich. In fact, chamomile is best suited to poor soils since too much fertility can lead to a decrease in essential oils in the plant which are responsible for the medicinal properties of chamomile.
Chamomile is not picky about pH and will tolerate pH from 5.6 to 7.5. It does need well-draining soil. To improve drainage in clay soils, add some compost, sand or peat moss.
If your soil is already sandy Chamomile will probably be happy. Once established Chamomile is drought tolerant, but it may need watering until then.
Sunlight Requirement for Chamomile
The plants thrive in full sun, though they will tolerate light shade. When choosing a site for planting, look for a spot that gets at least 6 hours of direct sunlight each day for the best flower production.
Chamomile Watering and Feeding
Water chamomile regularly during long dry spells, especially the first year. However, once established chamomile is very drought tolerant.
Keep in mind that too much nitrogen can overpower the delicate aroma of the foliage. Chamomile is adapted to poor soil conditions and should not need much if any fertilization especially once established. However, they may flower better with fertilizing the first year in spring and mid-summer.
Chamomile Plant Spacing and Propagation
Space
Start by sowing the seeds directly into the ground in spring, after the risk of frost has passed. Choose a location with full sun to partial shade and well-draining soil. Maintain a steady watering regime but ensure the soil never becomes waterlogged.
Propagation
Chamomile can also be propagated from cuttings in spring or early summer. Take a four-inch cutting of soft shoot growth and strip away the lower leaves. Plant it directly into soil that’s kept slightly moist, and it should take root within two weeks. Once established, water sparingly to avoid overwatering and potential root rot.
Roman Chamomile is a hardy perennial with few problems. It comes back from roots and self-seeds year after year. German Chamomile is an annual but self-seeds abundantly. Roman Chamomile can be propagated by rhizome cuttings.
Mature Width and Height
Roman chamomile plants can grow up to 18 inches (45 cm) tall and have a spread of around the same, so make sure you give them enough room when planting. German Chamomile plants can reach a height of 1 foot (30 cm).
Growing Chamomile from Seeds
Chamomile seeds should be started indoors 6-8 weeks before the last frost date in your area. Start by pre-soaking the seeds in lukewarm water overnight to soften their tough seed coats and aid germination. Prepare a pot of well-draining soil that’s kept slightly moist, and scatter the chamomile seeds on the surface. Cover with a very light layer of soil and keep the pot at a temperature of around 75°F (24°C). The seeds should germinate within two weeks but can take up to four weeks so be patient.
Once the seedlings are about 4” tall they can be transplanted into the garden. Plant them in groups of three or more spaced about a foot apart, in full sun and well-draining soil. Ultimately, the Roman chamomile plants will need to be divided every 3-4 years to maintain their vigor and prevent overcrowding.
Direct Sowing Chamomile
You can also sow chamomile directly into the garden. Wait until all danger of frost has passed and prepare a space that’s been amended with compost. Sow the seeds in shallow furrows and cover with a very light layer of soil, about 1/8” deep (0.3 cm). Keep the soil moist but not waterlogged while the seeds germinate. The seedlings should appear in 2-3 weeks. Space them a foot apart to allow for air circulation and enough light for the plants to thrive.
Some people have success sowing in the fall for spring growth. They may also sow again in the spring. Chamomile’s main need is a weed-free seed bed which is why I had no luck tossing seeds out and hoping for the best. That’s still my preferred method of planting though, but this year I’ll plant my chamomile in a raised bed and transplant from there.
Transplanting Garden Center Chamomile Plants
If you opt to buy chamomile plants from a garden center or nursery, you should transplant them in spring or early summer. Dig the new planting holes slightly larger than the root ball and add some compost to help with drainage. Carefully remove the plant from its pot and place it into the hole at the same depth as it was previously. Water well afterward. If the soil is very dry, you may need to water it a few days in advance.
Chamomile makes an excellent companion plant for other herbs and vegetables, such as onions, cabbage, and cucumbers. To further enhance the growth of your chamomile plants, mulch around them with organic compost or well-rotted manure. This will help

Chamomile Pests and Diseases
Aphids and slugs are common pests that can affect chamomile plants. Aphids are small, soft-bodied insects that can be green, yellow, black, brown, or red. They feed on plant sap, causing the leaves to curl and turn yellow. A strong stream of water or an insecticidal soap can be used to wash off the aphids.
Slugs and snails, on the other hand, are known to munch on the leaves and stems, leaving irregular, ragged holes. To deter these pests, you can use barriers like diatomaceous earth or copper tape, or traps baited with beer.
In terms of diseases, chamomile plants can be susceptible to powdery mildew. This fungal disease appears as a white powdery substance on the leaves and stems of the plant. Proper spacing of plants to ensure good airflow and watering at the base (not the leaves) can help prevent mildew. If it does occur, a fungicide or a homemade solution of milk and water can be used as treatment.
Remember, maintaining a healthy plant through proper care and attention is the best defense against pests and diseases. Regular inspections can help catch and address any issues early before they escalate.
Harvesting Chamomile
Chamomile flowers are ready to be harvested when the petals are fully opened and fragrant. To harvest, cut back the stems with a pair of scissors just before the flower starts to turn brown.
It’s best to harvest in the morning after any dew has evaporated, as this ensures that you get the most oil from the flowers. Dry the flowers as soon as you can to prevent mold growth; this can be done with a dehydrator or in an airy, sunny spot. Once fully dried, the chamomile flowers can be stored in airtight containers or used for tea and other products.
Chamomile plants are easy to care for and will reward gardeners with beautiful blooms that have a lovely scent and many uses. With the right care and attention, you can enjoy your own chamomile tea or handmade products for years to come. Happy gardening!
For more on growing herbs check out my article planting herbs in your garden.