For thriving echinacea, plant in full sun to partial shade, in well-draining soil, mulch, water regularly, deadhead flowers, and cut back in fall.
Introduction to Echinacea
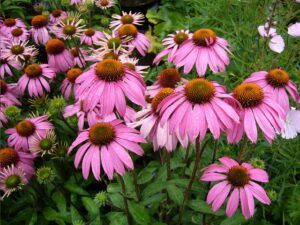
Learn how to grow Echinacea. Echinacea, commonly known as coneflower, is a genus of herbaceous flowering plants in the daisy family. It’s particularly known for its medicinal properties and is often used in traditional medicine to boost the immune system and ward off infections, particularly the common cold and other respiratory tract infections. Research suggests that Echinacea possesses a variety of compounds that can reduce inflammation and function as antioxidants, potentially aiding in the body’s defense against pathogens.
This hardy perennial thrives in the prairies and open wooded areas and is native to North America. Echinacea flourishes in zones 3 through 9, favoring well-drained soil and full to partial sun exposure. Its resilience and low maintenance make it a popular choice for gardeners looking to add not only a splash of color but also a touch of healing nature to their landscapes.
Selecting a Planting Site
When selecting an ideal planting site for Echinacea, it is essential to consider both the soil type and the sun exposure requirements. Echinacea plants prefer well-drained soils as standing water can lead to root rot. Loamy soil enriched with organic matter will give the best results, promoting strong, healthy growth. In terms of sun exposure, these perennials need full to partial sunlight to flourish. An area that receives at least 4 hours of direct sun per day is ideal, with the added benefit of promoting vibrant blooms and robust immune-supporting properties. It’s important to ensure the selected site can accommodate the plant’s growth, as Echinacea can reach up to 4 feet in height and 2 feet in spread.

Preparing the Soil
Preparing the soil for Echinacea begins with loosening the soil to a depth of 12 to 15 inches to accommodate the deep taproots that Echinacea plants develop. This can be achieved by using a shovel or a tiller, depending on the size of the planting area. Once the soil is loosened, integrate compost or aged manure to enhance soil fertility and improve drainage—a critical step for preventing waterlogged conditions that can harm the plant’s roots.
An optimal pH for Echinacea plants is typically between 6.0 and 8.0, indicating a preference for neutral to slightly alkaline soil conditions. If a soil test reveals a pH outside of this range, adjustments can be made. To raise the pH of overly acidic soil, apply garden lime as directed. Conversely, to lower the pH of overly alkaline soil, amendments such as sulfur or aluminum sulfate can be utilized. However, Echinacea is fairly adaptable and can tolerate a range of soil conditions, so drastic adjustments are usually not necessary. Regular testing and observing plant health will guide any incremental changes needed to maintain an ideal growing environment.
Planting Echinacea Seeds or Seedlings
When planting Echinacea from seeds, start by sowing them 1/8 inch deep in the prepared soil. Make sure to space the seeds out by at least 18 inches apart to provide each plant enough room to grow without crowding. If you’re starting with seedlings or nursery plants, the process will be slightly different:
- Begin by digging holes that are just as deep as the root ball of your seedlings but twice as wide.
- Carefully remove the seedling from its container, being gentle to avoid damaging the roots.
- Place the seedling in the hole so that the top of the root ball is level with the soil surface.
- Backfill the hole with soil, and gently firm it around the base of the plant to eliminate air pockets.
- Space the plants approximately 18 to 24 inches apart to provide ample airflow and prevent fungal diseases due to overcrowding.
- Water the Echinacea plants thoroughly after planting to help settle the soil around the roots and provide necessary hydration for growth.
Remember to keep the soil consistently moist, but not waterlogged, until the seedlings are well-established. As they grow, Echinacea plants will become more drought tolerant and require less frequent watering.
Watering and Mulching
After planting, young Echinacea seedlings will need to be watered more frequently to encourage root establishment—typically every other day or so, depending on weather conditions. Once established, Echinacea plants are drought-resistant, requiring water only when the top layer of soil feels dry. Established plants typically need just 1 inch of water per week, either from rainfall or manual watering. Mulching serves a crucial role in maintaining moisture and controlling weeds. A 2 to 3-inch layer of organic mulch, such as shredded bark or straw, applied around the base of the Echinacea plants, can help to retain soil moisture and regulate soil temperature. Additionally, mulch decomposes over time, improving soil structure and fertility, ultimately contributing to the robust health of Echinacea plants.
Fertilization and Care
Fertilization is another component to consider in the care regimen for Echinacea plants. While not heavy feeders, an annual application of a balanced, slow-release fertilizer can promote lush foliage and vibrant blooms. Apply the fertilizer in the spring as new growth appears, following the manufacturer’s instructions for the recommended amount. It’s important, however, not to over-fertilize, as this can lead to an abundance of foliage with fewer flowers and might also render the plants more susceptible to disease. Aside from this, Echinacea plants require little care once established, but deadheading the spent flowers can encourage additional blooming and prevent the plants from self-seeding excessively.
Pruning and Deadheading Echinacea
Pruning and deadheading Echinacea not only improves the plant’s appearance but also stimulates further flowering. To deadhead, simply snip off the spent flower heads down to a leaf where new buds may be forming. This can be done throughout the blooming season to keep the plants looking tidy and encourage more blooms. In early spring or late fall, you can cut back the entire plant to about 4-6 inches from the ground to help promote healthy growth for the next season. Pruning at the right time helps to prevent disease and allows for a fresh start each year. Remember, while Echinacea can survive with minimal care, these pruning practices ensure a more vibrant and prolific display.
Pest and Disease Management
Echinacea plants can be affected by various pests such as aphids, Japanese beetles, and spider mites. These small insects can cause significant damage by sucking sap from leaves and stems, leading to distorted growth and a weakening of the plant. Diseases like powdery mildew, bacterial leaf spot, and aster yellows also pose a threat to Echinacea, manifesting as discolored foliage, stunted growth, or abnormal flower development.
To combat these issues, gardeners have a range of organic and chemical control options. Organic approaches include introducing beneficial insects like ladybugs to naturally reduce aphid populations or applying neem oil as a treatment against a variety of Echinacea pests and mildew. For chemical solutions, insecticidal soaps can be effective against certain pests without causing undue harm to the environment. Fungicides may be used to control fungal diseases, but it is essential to follow the manufacturer’s instructions precisely and only as a last resort after cultural and organic methods have been tried.
Harvesting and Using Echinacea
Harvesting Echinacea
Echinacea can be harvested for its flowers, leaves, and roots, all of which hold medicinal properties. The best time to harvest flowers and leaves is when the plant is blooming, typically in mid-summer. Snip the flower heads early in the day after the dew has evaporated, and choose leaves that are vibrant and free of blemishes. Roots are best harvested in the fall from plants that are at least three to four years old, as the medicinal compounds are more concentrated in mature plants.
To harvest the roots, carefully dig around the plant to expose the root ball, then gently lift the plant from the soil. Shake off excess dirt and wash the roots thoroughly. Once harvested, the plant parts can be used fresh or dried. For drying, spread the flowers, leaves, and roots in a single layer on a clean, dry surface out of direct sunlight, or use a dehydrator set at a low temperature.
Utilizing Echinacea in Herbal Remedies
Echinacea’s healing properties make it a staple in herbal medicine, commonly used to bolster the immune system and ward off colds and flu. To harness its benefits:
- Echinacea Tea: Dry the leaves and flowers, crumble them, and steep a teaspoon of the herb in boiling water for 15 minutes. Strain and drink the tea to boost the immune system.
- Tincture: Fill a jar with dried Echinacea parts and cover with vodka. Seal the jar and let the mixture sit for about six weeks, shaking it occasionally. Strain the liquid, and use the tincture by diluting a few drops in water when needed.
- Topical Applications: A salve made from Echinacea can be applied to wounds, burns, or skin irritations. Combine infused oils of Echinacea with beeswax to create a soothing balm.
- Capsules: Powder dried roots, leaves, and flowers for use in homemade capsules. This option allows for precise dosing and convenience.
When using Echinacea in any form, it’s crucial to respect dosing guidelines and consult with a healthcare professional, especially if you have underlying health conditions or are taking other medications.
What part of echinacea are used as medicine?
All parts of the Echinacea plant can be used as medicine, including the leaves, flowers, and roots. However, the most common parts used in herbal remedies are the dried leaves and flowers. The roots may also be used in some preparations, but they require a longer drying time compared to the other plant parts. It is important to note that different parts of the plant may have varying levels of potency, so it is essential to follow proper dosing guidelines and consult a healthcare professional before using Echinacea as medicine. Additionally, some herbalists recommend using a combination of different plant parts for maximum effectiveness. Experimentation and finding what works best for your body may be necessary when incorporating Echinacea into your wellness routine. So, don
Propagation Techniques for Echinacea
Propagation Through Division
To propagate Echinacea through division, undertake the process in the spring or early fall when the plant is not in bloom. Begin by carefully digging around the plant to avoid damaging the root system. Gently lift the plant from the soil and shake off any excess dirt. Using a sharp spade or knife, divide the clump into smaller sections, ensuring that each section has several shoots and a portion of the root system. Replant the divisions immediately at the same depth they were growing before, spacing them about 12 to 18 inches apart to allow for mature growth.
Propagation Through Seeds
Alternatively, sowing Echinacea seeds directly in the garden can be done in the fall, allowing for natural stratification during the winter. Prepare the soil by loosening it and adding compost to enrich it. Scatter the seeds evenly over the prepared soil and lightly cover with additional soil or compost. Water gently, keeping the soil moist until germination occurs. In the spring, thin the seedlings to prevent overcrowding.
Do echinacea seeds require stratification and how do you stratify seeds?
Echinacea seeds do require stratification, which is the process of exposing the seeds to a period of cold and moist conditions in order to break their dormancy and stimulate germination. This mimics the natural cycle that occurs in nature during the winter months.
To stratify echinacea seeds, place them in a plastic bag with some damp peat moss or perlite and refrigerate for 4-6 weeks. After the stratification period, sow the seeds in moist soil and continue to keep them in a cool location until they germinate.
Alternatively, you can also sow echinacea seeds directly in the garden in the fall and allow for natural stratification during the winter months. This method is more suitable for regions with cold winters.
It is important to note that not all echinacea species require stratification. Some varieties, such as Echinacea purpurea and Echinacea pallida, will germinate without the need for stratification. However, it is still recommended to stratify these seeds in order to increase their germination rates.
In addition, echinacea plants grown from seeds may not produce flowers in their first year, so patience is key. With proper stratification and care, echinacea plants will establish strong root systems and produce beautiful blooms in the following years.
In conclusion, understanding how to stratify echinacea seeds is crucial for successful germination and establishment of these beautiful flowering plants. Whether using the refrigerator method or allowing for natural stratification, following these steps will ensure healthy and vibrant echinacea plants for years to come.
Best Practices for Healthy Growth
For both division and seed propagation, ensure the planting site receives full sunlight to partial shade and has well-draining soil. Regular watering during the first growing season is crucial to establish a strong root system. Applying a layer of mulch can help retain soil moisture and regulate temperature fluctuations. To encourage more vigorous plants and blooms, deadhead spent flowers regularly, and cut back the stalks to ground level in the late fall after the plant has gone dormant. With the right care, Echinacea plants will thrive and bring years of beauty and herbal benefits to your garden.
Conclusion
In summation, the diligent care of Echinacea plants, through appropriate stratification of seeds, site selection, and consistent maintenance, is paramount. These practices not only enhance germination rates and subsequent flowering potential but also fortify the plants’ ability to withstand pests and diseases. By investing the time to nurture these resilient yet delicate perennials, gardeners can reap the rewards of a vibrant and beneficial addition to their horticultural endeavors.