Discover how to grow plums in your backyard! Our expert guide covers everything from planting to harvesting, ensuring a bountiful crop of sweet, juicy plums.
Introduction
Plum trees are a delightful addition to any garden, offering not only delicious fruit but also beautiful spring blossoms. Imagine the joy of biting into a juicy, homegrown plum, knowing you nurtured it from a tiny sapling. Whether you’re an experienced gardener or just starting your green thumb journey, growing plums can be a rewarding endeavor. In this comprehensive guide, we’ll explore everything from selecting the right plum variety to harvesting those luscious fruits. Get ready to dig in!
Choosing the Right Plum Variety
Selecting the perfect plum variety is your first step toward a fruitful harvest. There are two main types of plums to consider: European and Japanese. European plums are typically more cold-hardy and are often used for drying into prunes. Japanese plums, on the other hand, tend to be juicier and are great for eating fresh. Considering your climate is crucial in making this decision. If you live in a colder region, a European variety might suit you better, while those in warmer areas could thrive with Japanese plums.
Popular cultivars for home gardens include the European ‘Stanley’ and the Japanese ‘Santa Rosa.’ Both are renowned for their delicious fruit and adaptability. Additionally, consider whether you want a dwarf or standard-sized tree. Dwarf varieties are easier to manage and perfect for smaller spaces, whereas standard trees can offer larger yields.
Preparing Your Planting Site
The success of your plum tree heavily depends on the right planting conditions. Plum trees thrive in well-draining soil with a slightly acidic to neutral pH level. Conduct a soil pH test to determine if adjustments are needed. Amend the soil with organic matter to improve drainage and nutrient content.
Sunlight is another crucial factor. Plum trees need full sun, so choose a location that receives at least six to eight hours of direct sunlight daily. Proper spacing is essential to allow air circulation and prevent disease. Standard trees should be planted about 15-20 feet apart, while dwarf varieties can be spaced closer, around 10 feet.
Planting Your Plum Tree
Timing is everything when it comes to planting plums. The best time to plant is in early spring when the ground is thawed and the risk of frost has passed. Follow these step-by-step instructions for successful planting:
- Dig a hole twice as wide and as deep as the tree’s root ball.
- Place the tree in the hole, ensuring the graft union is above soil level.
- Backfill with soil, tamping down gently to remove air pockets.
- Water thoroughly to settle the soil around the roots.
- Apply a layer of mulch around the base to retain moisture and suppress weeds.
Newly planted trees require consistent watering. Keep the soil moist but not waterlogged. A drip irrigation system can be beneficial for maintaining the ideal moisture level.
Caring for Your Plum Tree
Once your plum tree is in the ground, proper care is vital for its health and productivity. Start with a fertilization schedule that includes balanced nutrients. An all-purpose fruit tree fertilizer applied in early spring can boost growth.
Pruning is essential for shaping the tree and encouraging fruit production. Prune during the dormant season to remove dead or diseased wood and thin out crowded branches. This promotes better air circulation and light penetration, reducing the risk of fungal diseases.
Pest and disease management is critical. Keep an eye out for common pests like aphids and plum curculios. Implement organic pest control methods, such as neem oil, to protect your trees. Additionally, provide winter protection for young trees by wrapping trunks with burlap to prevent frost damage.
Pollination and Fruit Set
Understanding plum pollination is key to a successful harvest. Some plum varieties are self-fertile, meaning they can produce fruit without a pollinator. However, others require cross-pollination with a different variety. Research your chosen cultivar’s pollination needs and consider planting compatible varieties.
Attract pollinators like bees to your garden by planting wildflowers or using bee houses. Hand pollination is an option if natural pollinators are scarce. Gently transfer pollen from one flower to another using a brush.
Thinning fruit is essential to ensure high-quality plums. After fruit set, prune away excess fruit to prevent overcrowding and stress on the branches. This results in larger, sweeter plums.
Harvesting and Storing Plums
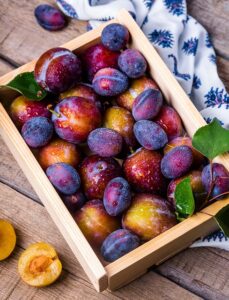
Knowing when your plums are ripe is crucial for enjoying them at their best. Ripe plums will have vibrant color and give slightly when gently pressed. Harvest by twisting and pulling the fruit from the tree.
Handle plums carefully to avoid bruising. Store them in a cool, dry place if you plan to consume them within a few days. For longer storage, refrigerate plums or preserve them through freezing, canning, or drying.
Preserving plums allows you to enjoy their flavor year-round. Freezing is simple—just wash, pit, and slice the plums before placing them in airtight bags. Canning involves cooking the plums in sugar syrup and sealing them in jars. Drying is another option, creating delicious snacks for later.
Conclusion
Congratulations! You now have the knowledge to cultivate your own plum trees at home. Remember, patience is key—plum trees take time to mature and produce fruit, but the rewards are worth the wait. By following these steps, you’ll soon be enjoying the sweet, juicy plums you’ve nurtured from start to finish. Become the neighborhood’s plum expert, share your bounty, and inspire others to join the world of gardening. Happy planting, and may your garden be bountiful!