Mastering the Basic of Fermentation
So let’s get in to how to start fermenting. If you want to start a fermentation project that will succeed, there are some essential steps you should keep in mind. The first step is to figure out which type of fermentation you want to do. This choice will affect the materials you’ll need and the length of time it will take for the fermentation process to complete. Some common examples of fermentations include making beer, wine, cheese, kimchi, yogurt, kefir, kombucha, and sauerkraut.
Once you have chosen a type of fermentation, it is important to source the ingredients needed for the project. Depending on the type of fermentation, these ingredients can vary greatly and may include items such as grains, fruits, vegetables or dairy products. It is also important to obtain proper containers that are sterile and clean in order to prevent contamination and spoilage.
To successfully ferment, it’s crucial to understand the basic principles and requirements. This includes knowing the necessary temperatures and humidity levels, and monitoring regularly for spoilage or contamination. Additionally, be sure to gather all the required ingredients and containers before starting.
After all these steps have been completed, you can begin the fermentation process. Depending on the type of fermentation you are pursuing, this may involve adding ingredients to a container and allowing them to sit for an extended period of time, or it may require stirring and frequent monitoring in order to ensure that temperatures and humidity levels remain at appropriate levels.
Simple Example of Fermenting Juice
I love to ferment juice using my ginger-bug and Kefir water. You can do any kind of juice you want but I usually do citrus. The ginger-bug and kefir water are my fermenting agents. If you don’t know what these are check out my article:
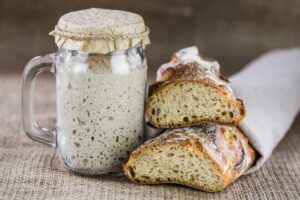
For more information on how to make a sourdough starter check my article here
For more information on a ginger bug starter check here.
Here are the steps I take:
- Feed my ginger-bug and kefir ferments and be sure they are nice and bubbly. I keep mine in fridge between ferments so I set them out a few days before I want to ferment and feed them.
- Wash the bottles, pans, funnels and strainers I will need in hot sudsy water and rinse well.
- Begin 2-3 quarts of water to boil in my clean pan with 2 cups of sugar added. The goal is to dissolve the sugar.
- In my large tea pot bring water to boil
- While all that’s going on I juice my oranges, lemons and limes. I like to keep the pulp but you can strain it if you want. I use about 6 oranges and 1-2 lemons and limes. It depends on how many bottles you want to make and how big they are.
- You need flip top bottles for this ferment. You can get them here. I pour boiling water into the bottles to sterilize using a funnel.
- Pour your juice dividing equally between your bottles. The juice if for flavor. You will finish filling with the sugar water. Don’t worry the ferment eats the sugar.
- Add your fermenting agents. I just eyeball and put about 1 1/2 inches of ferment in each bottle.
- Add your cooled(should be able to touch with your fingers. Too hot will kill the ferment) sugar water to the shoulder of the bottle and close the lids.
- Place in a cool dry are. I just keep mine on the counter.
- Burp the flip tops daily. Your looking for a nice pop but hopefully not an explosion! Do NOT forget to burp your bottles!
- Once they are burping nicely, put in fridge and cool to enjoy. (generally 2-3 days on counter)
This makes a very nice fizzy drink that will get less sweet as time passes and more beery tasting. Still a pleasant taste and full of probiotics. I drink it as a daily tonic. You do have to continue burping bottles daily. DO NOT FORGET. Too much pressure build up can result in a exploded bottle and big mess.
Timeframes for Fermentation
When it comes to fermentation, the time-frame for completion can vary greatly. For example:
- brewing beer typically takes anywhere from two weeks to two months while
- fermenting cheese may take up to several months.
- fermentations such as yogurt and sauerkraut require frequent stirring or monitoring throughout the entire process
- wine fermentations are typically left undisturbed.
- when in doubt refer back to your recipe and be sure you get the recipe from a reputable site.
Finally, it is important to understand that the results of fermentation can vary greatly and may require some experimentation in order to obtain desired results. As such, it is important to keep detailed records throughout the process in order to document any changes or adjustments that may need to be made for future batches. With a little patience and practice, fermentation can be a rewarding and enjoyable experience.
Tools for Fermentation
When fermenting food and drinks, it is important to use the right vessels, lids, and tools. Commonly used containers include glass jars, plastic buckets, ceramic crocks, and fermentation crocks with weights. Depending on what is being fermented, certain container materials are preferable due to their non-reactive nature.
For example, acidic foods, such as sauerkraut or pickles, should not be fermented in an aluminum container. The lid should be airtight to prevent oxygen from entering the vessel and hinder the growth of undesirable bacteria. A fermentation weight can also be used to hold down vegetables beneath the brine solution. Measuring spoons and thermometers are essential when trying to get the exact proportions of ingredients needed for your project as well as monitoring temperature levels throughout fermentation. Finally, it is always a good idea to keep detailed notes about all aspects of the process so that adjustments can be made in future batches if necessary.
Here is a general list of tools you might need. These are Amazon affiliate links and I’d certainly appreciate your click but you can just go directly to Amazon if you’d rather. These products make fermenting easier but really you can ferment with just a mason jar. You just have to remembers to open lid and let off gas daily.
Troubleshooting
Trouble shooting your ferments is very ferment specific. It will not be the same for fermented vegetable as it will be for fermented beverages, cheese or yogurt. We will discuss more specific troubleshooting in the various sections on different ferments.
Generally speaking though if you are not getting the results you desire, there could be a few reasons why. First of all, make sure that all ingredients and tools are sterile before beginning in order to reduce the risk of contamination from bacteria or yeast. If the temperature is too high or low during fermentation, this can also lead to problems with flavor or texture. Finally, an insufficient amount of salt in your brine when doing vegetables or other seasonings can also leave the finished product tasting bland. If none of these factors are causing issues, then it could simply be that you need to give the fermentation process more time. Keep in mind that different vegetables, drinks and recipes will take differing lengths of time to reach optimal taste.

Online gardening class
Good luck and happy fermenting!